The Making of My Nail Shelves
So a bajillion months ago, I promised I would post how I made my nail shelves. You’ve seen them, but here is the “how”. This post is a doozy, in both words and pictures and I would not be even a teeny bit offended if those of you who are not interested skip it entirely :P
I really like building things. Like seriously man, with a power drill and a jigsaw and a workbench, I would be unstoppable. These last few weeks in my apartment I have done SO MUCH and it practically looks like someone lives here now! My shoes all have a home! (All 70 of them..)

Like that, but me instead of a T-rex and power tools instead of arm extender thingies.
But for now, I make do with borrowing my dad’s drill for 6 months and relying on home Depot to cut things for me And taking apart pre-existing furniture and re-purposing it to do what I want. Also I am terrible at finding studs in the wall, but that is another story.
This shelf, however, required very little in the way of tools. You do need that power drill and a staple gun is preferable, but a manual staple gun works great. There aren’t a lot of cuts in the wood, so Home Depot will do them for free.
Materials and tools:
- — 2 1×2″ boards, 8ft long.
- — one piece of foam board. (I learned the hard way that this is CRAZY expensive at Michaels ($12 for a pack of two), but can be bought at the Walmart for $2 a board and I think a lot of dollar stores carry it too).
- — Lots of wood screws. This part is not an exact science, but size 8 screws that are about 1.5 inches long are a safe bet. I used 28 per shelf. You could also easily use nails. Screws will build a stronger shelf, but nails will work too, although you’ll still want to drill pilot holes for them
- — wooden dowels for the “suicide bars”
- — U-shaped nails to hold those suicide bars on
- — staple gun and staples. I think I used 1/2 inch ones.
- — Power drill and drill bit that is slightly smaller than the screws you chose to use
- — (Optional) Electric screwdriver, because having that second tool is SO much nicer than hand screwing in all those screws or changing out the drill bit every time you need to screw in one of the screws
This is the electric screwdriver my boyfriend got me for my birthday. It is awesome and made a great addition to my “Home Improvement Barbie” Halloween costume, but that is neither here nor there.
Instructions:
Alright, I’m not great at exact details when I’m building something so I’m certainly not great at writing them down and communicating them to other people. But I will do my best.
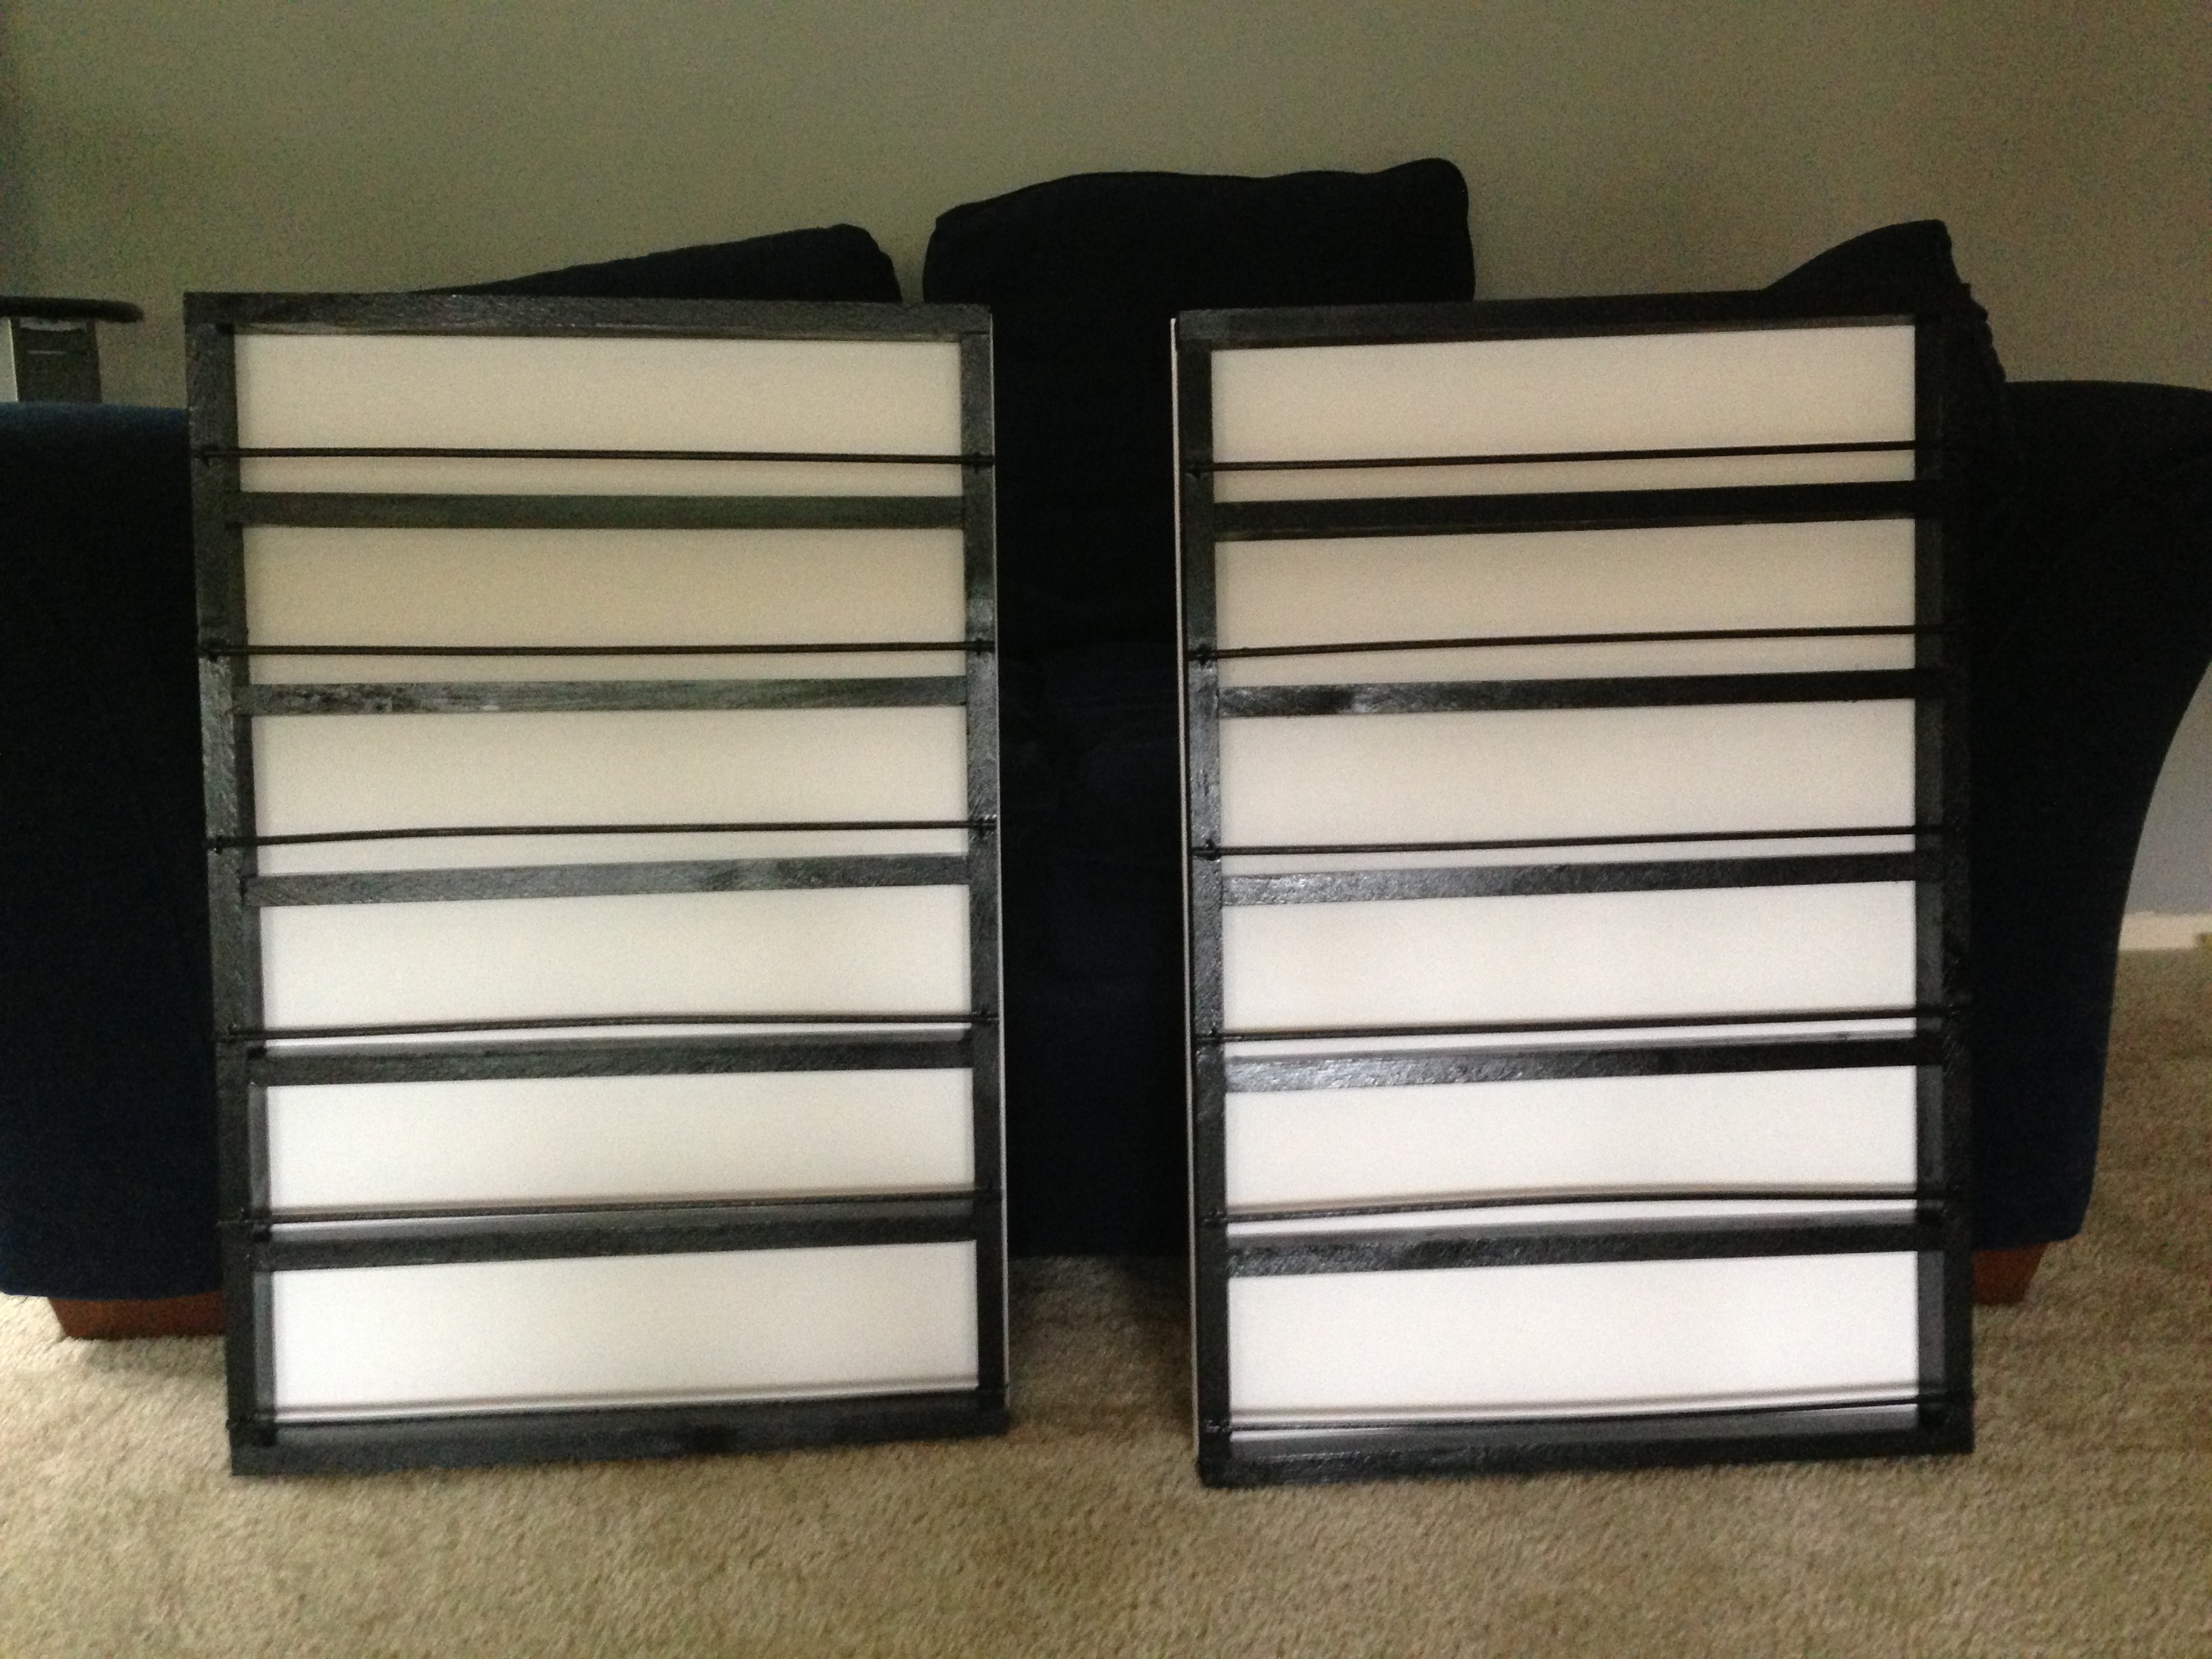
So here are the assembled materials, more or less. I used fancy tools for squaring and measuring precisely for the first shelf I built (along with my dad’s help). The second one I built on my own with less tools, but the last one I built on the porch of my apartment, by myself, with other the materials and tools listed above. And You honestly can’t tell the difference (other than the fact that I built one upside-down, but that has nothing to do with tools and everything to do with being careful and also my laziness in not wanting to take it apart and screw it back together because you can barely tell).
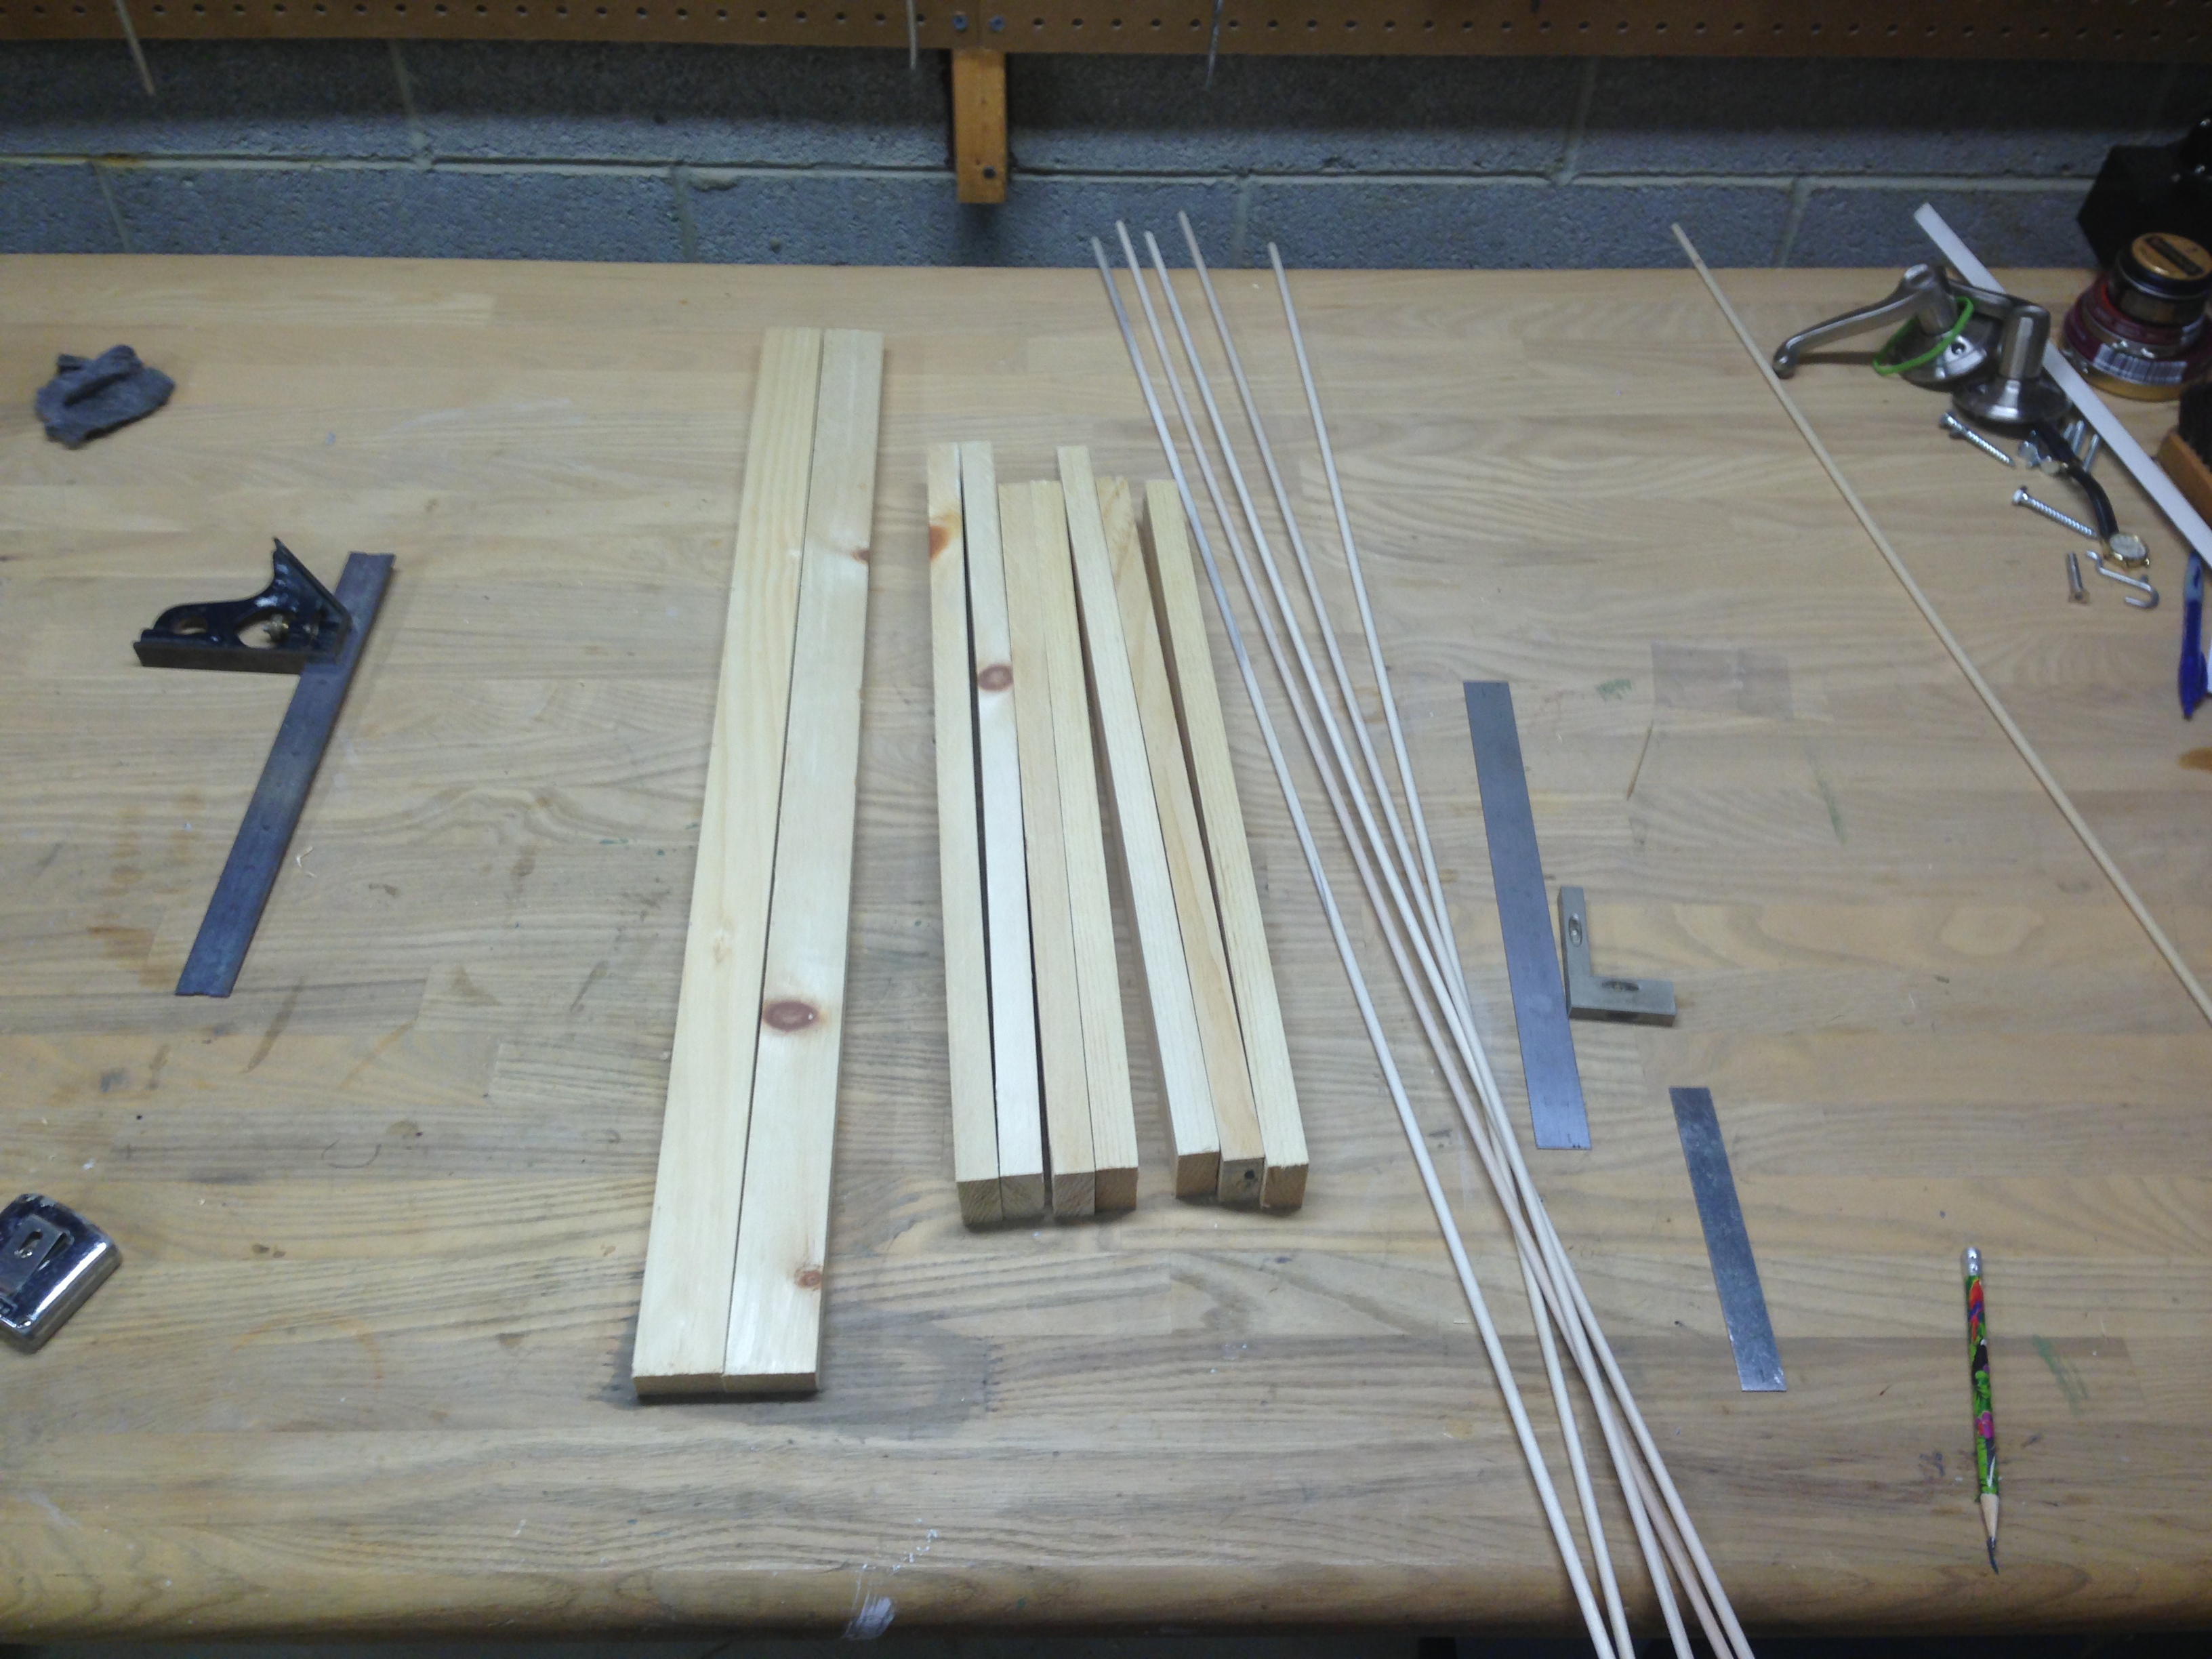
Alright, so those pieces are all pre-cut by the lovely Home Depot people. I planned the shelves around the foam board, because it is a bitch to cut foam board. Seriously, have you ever tried? Which actually worked out well, as I only had about 3 inches of wood left in the two 1X2 boards. Here is how I cut the boards to perfectly fit on a 20×30″ piece of foam board.
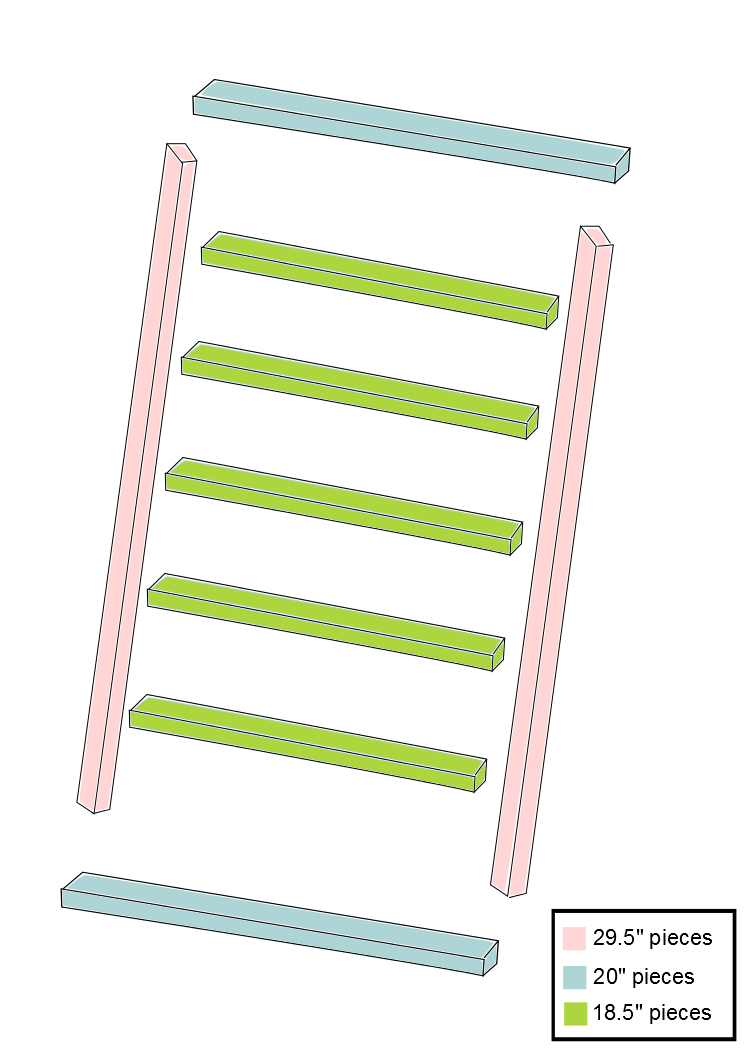
- — 2 29.5 inch pieces for the sides
- — 2 20 inch pieces for the tops
- — 5 18.5 inch pieces for the shelves
Now, this is very important, when you cut the boards, make sure the two long pieces are cut from the same piece, or you can’t fit all these pieces on two 8 ft boards.
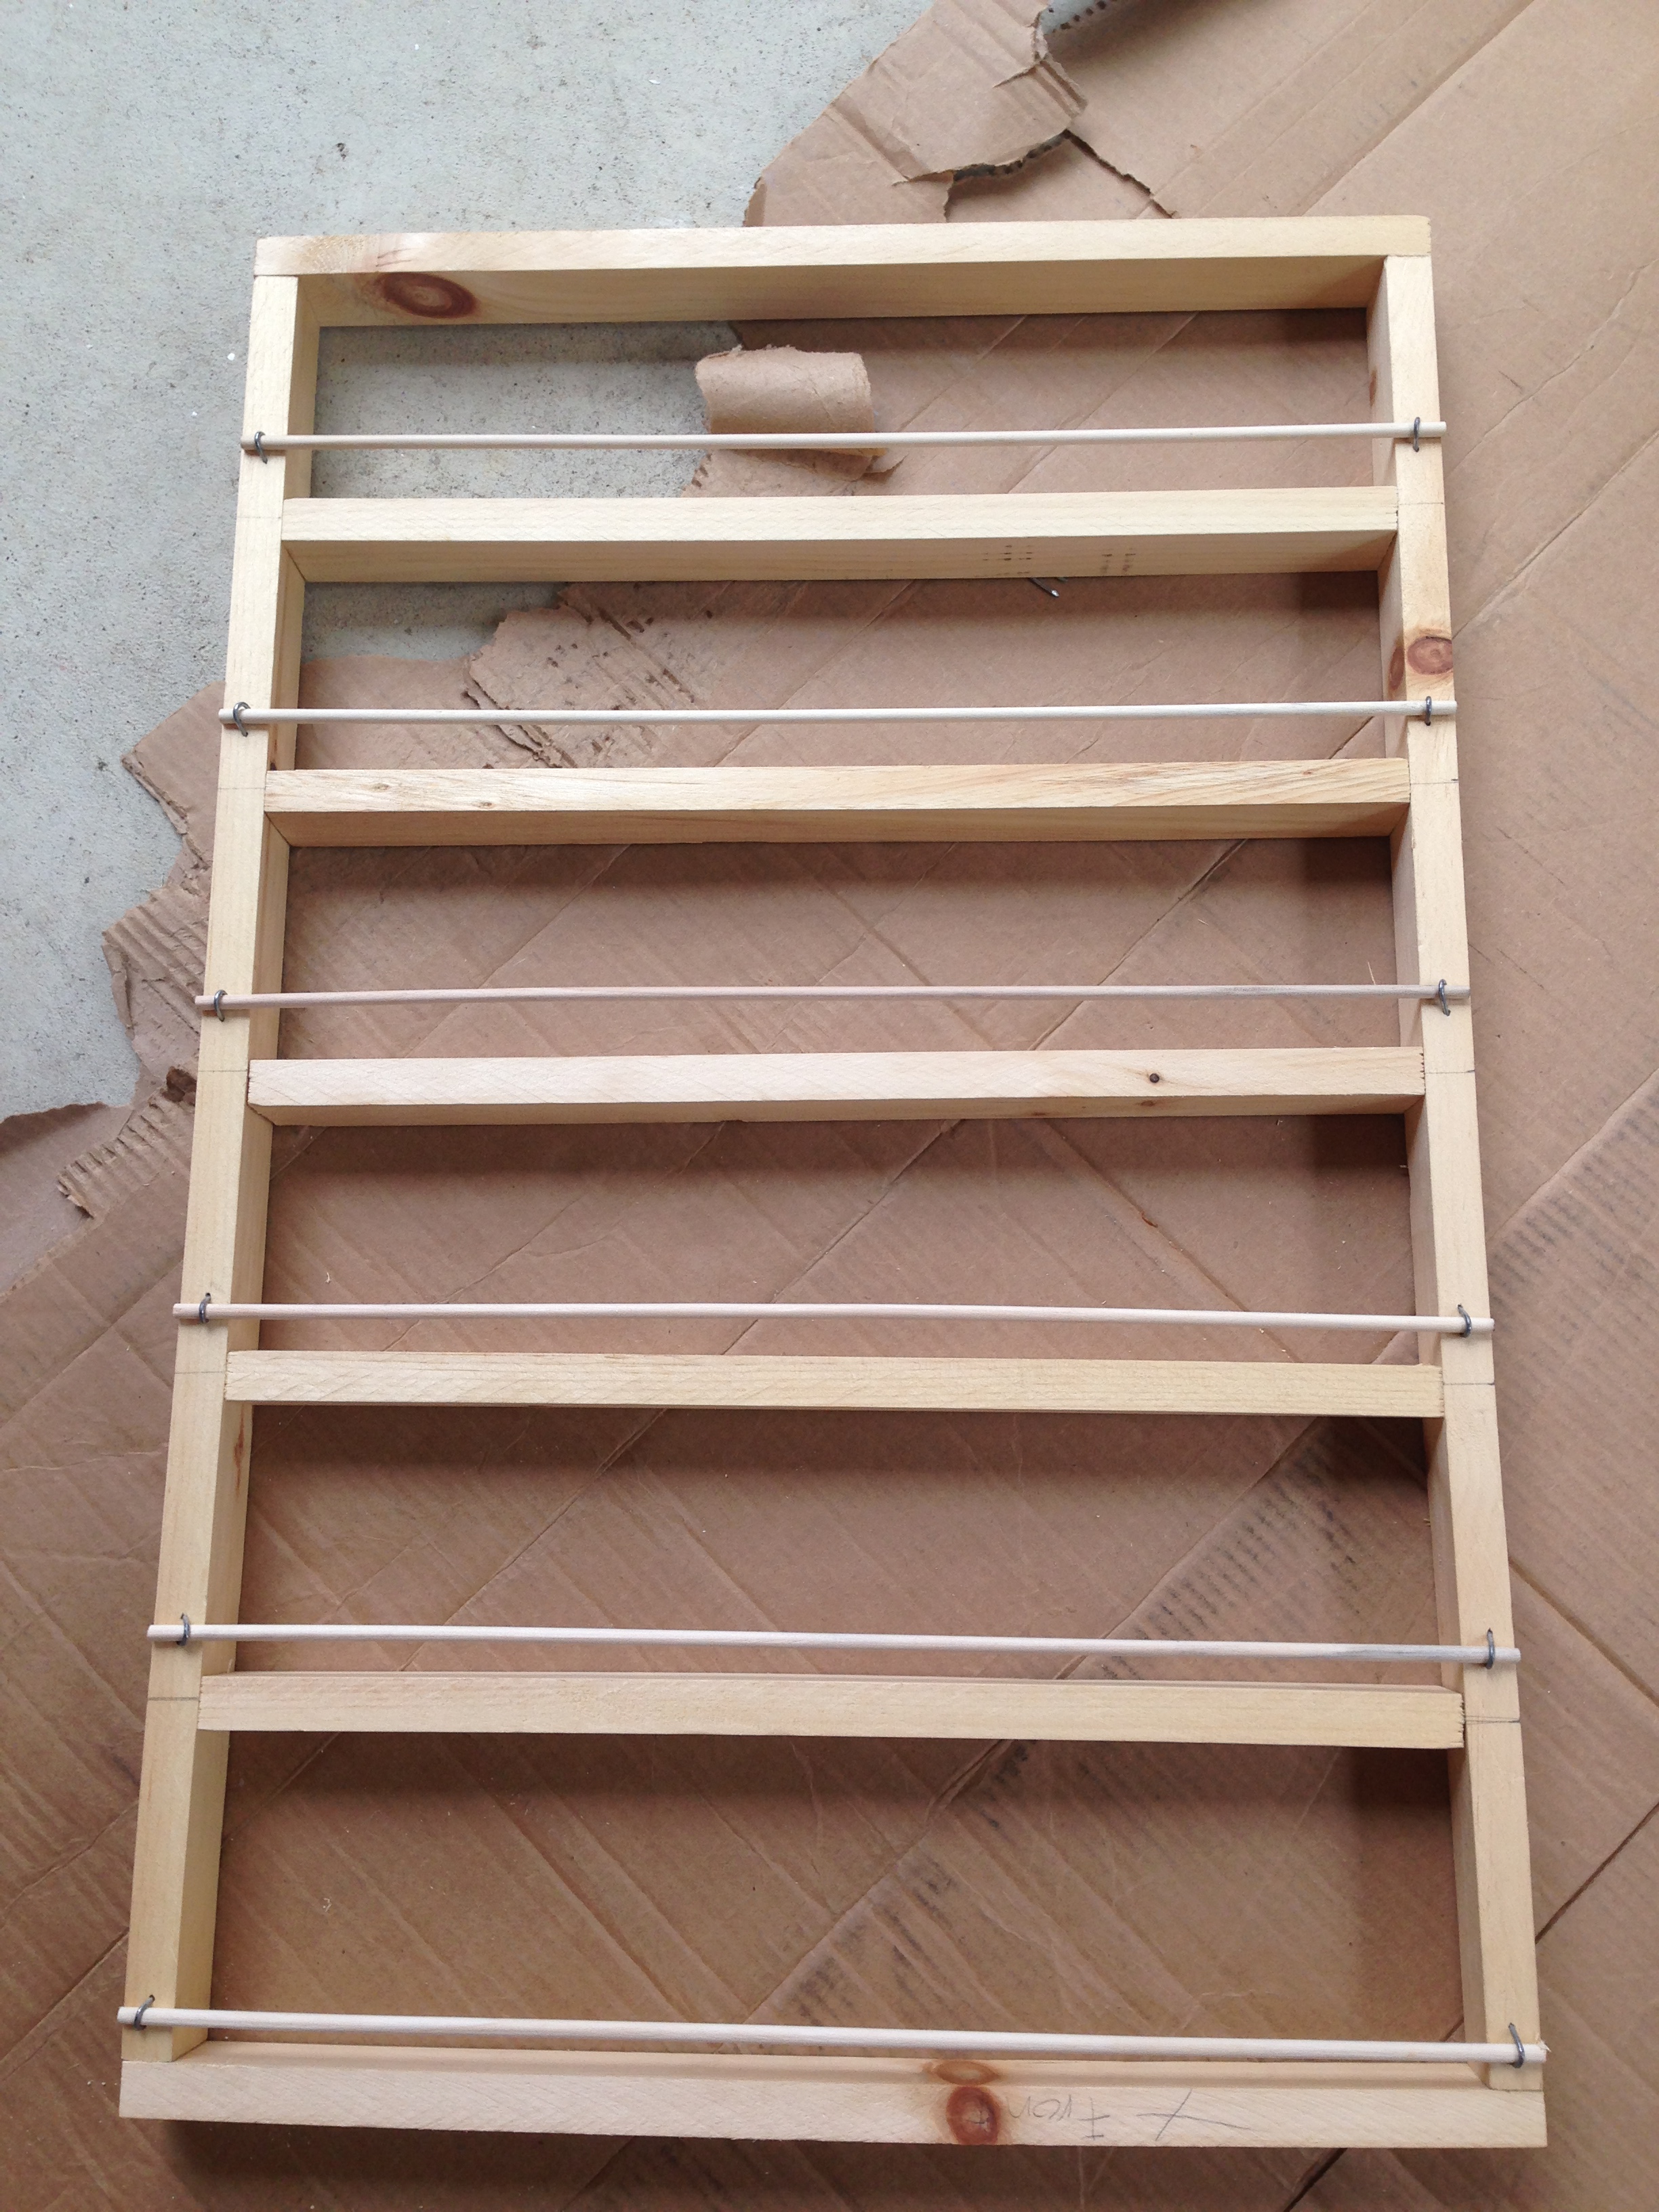
First thing I did was a lot of measuring and marking. I measured where each of the 5 internal shelves would go. 5 shelves means 6 spaces and 29.5 divided by 6 is 4.92. That’s weird, so I measured 4.75 inches for the first 5 shelves and the last one was a little taller. I’m really not a perfectionist. I’m a “convenient but still works” ist.
Next I built the frame so that when I put in the shelves, there would be the frame already there to help me keep the shelves square. I’d like to say that was my idea, but it was probably my Dad’s. This is probably one of the trickier parts, because you want to be pretty careful that they get put on square. i used the ground for that. Be pretty careful about how you drill the pilot holes for the screws, because if they are crooked, the whole frame will be crooked. I put two screws in each joint.
Once the frame was done, I put the shelves on one by one. I didn’t tighten the screws all the way until all the shelves were on.
For whatever reason, the next part is the part I hated most. The suicide bars. each dowel is cut to the width of the whole shelves (20″) and then I nailed on each one with the U-shaped nails. I dunno, it was tedious and I hated it. I did manage to pass off some of that task to the boyfriend, but he got frustrated because he’s really exacting and it’s basically impossible to get all the dowels the same. If I make more of these, I am going to have to invent a better way to do that.
However, here is the final, built product.
Painted it, stapled on the foam board, blah blah blah. That’s the easy part. Although I recommend spray paint.Hand painting is a pain.
I know I could improve on the design of these, but for now, they are awesome. Oh, and since I made three and bought the foam board in packs of two, I had an extra piece and made this out of it. Because I am awesome.
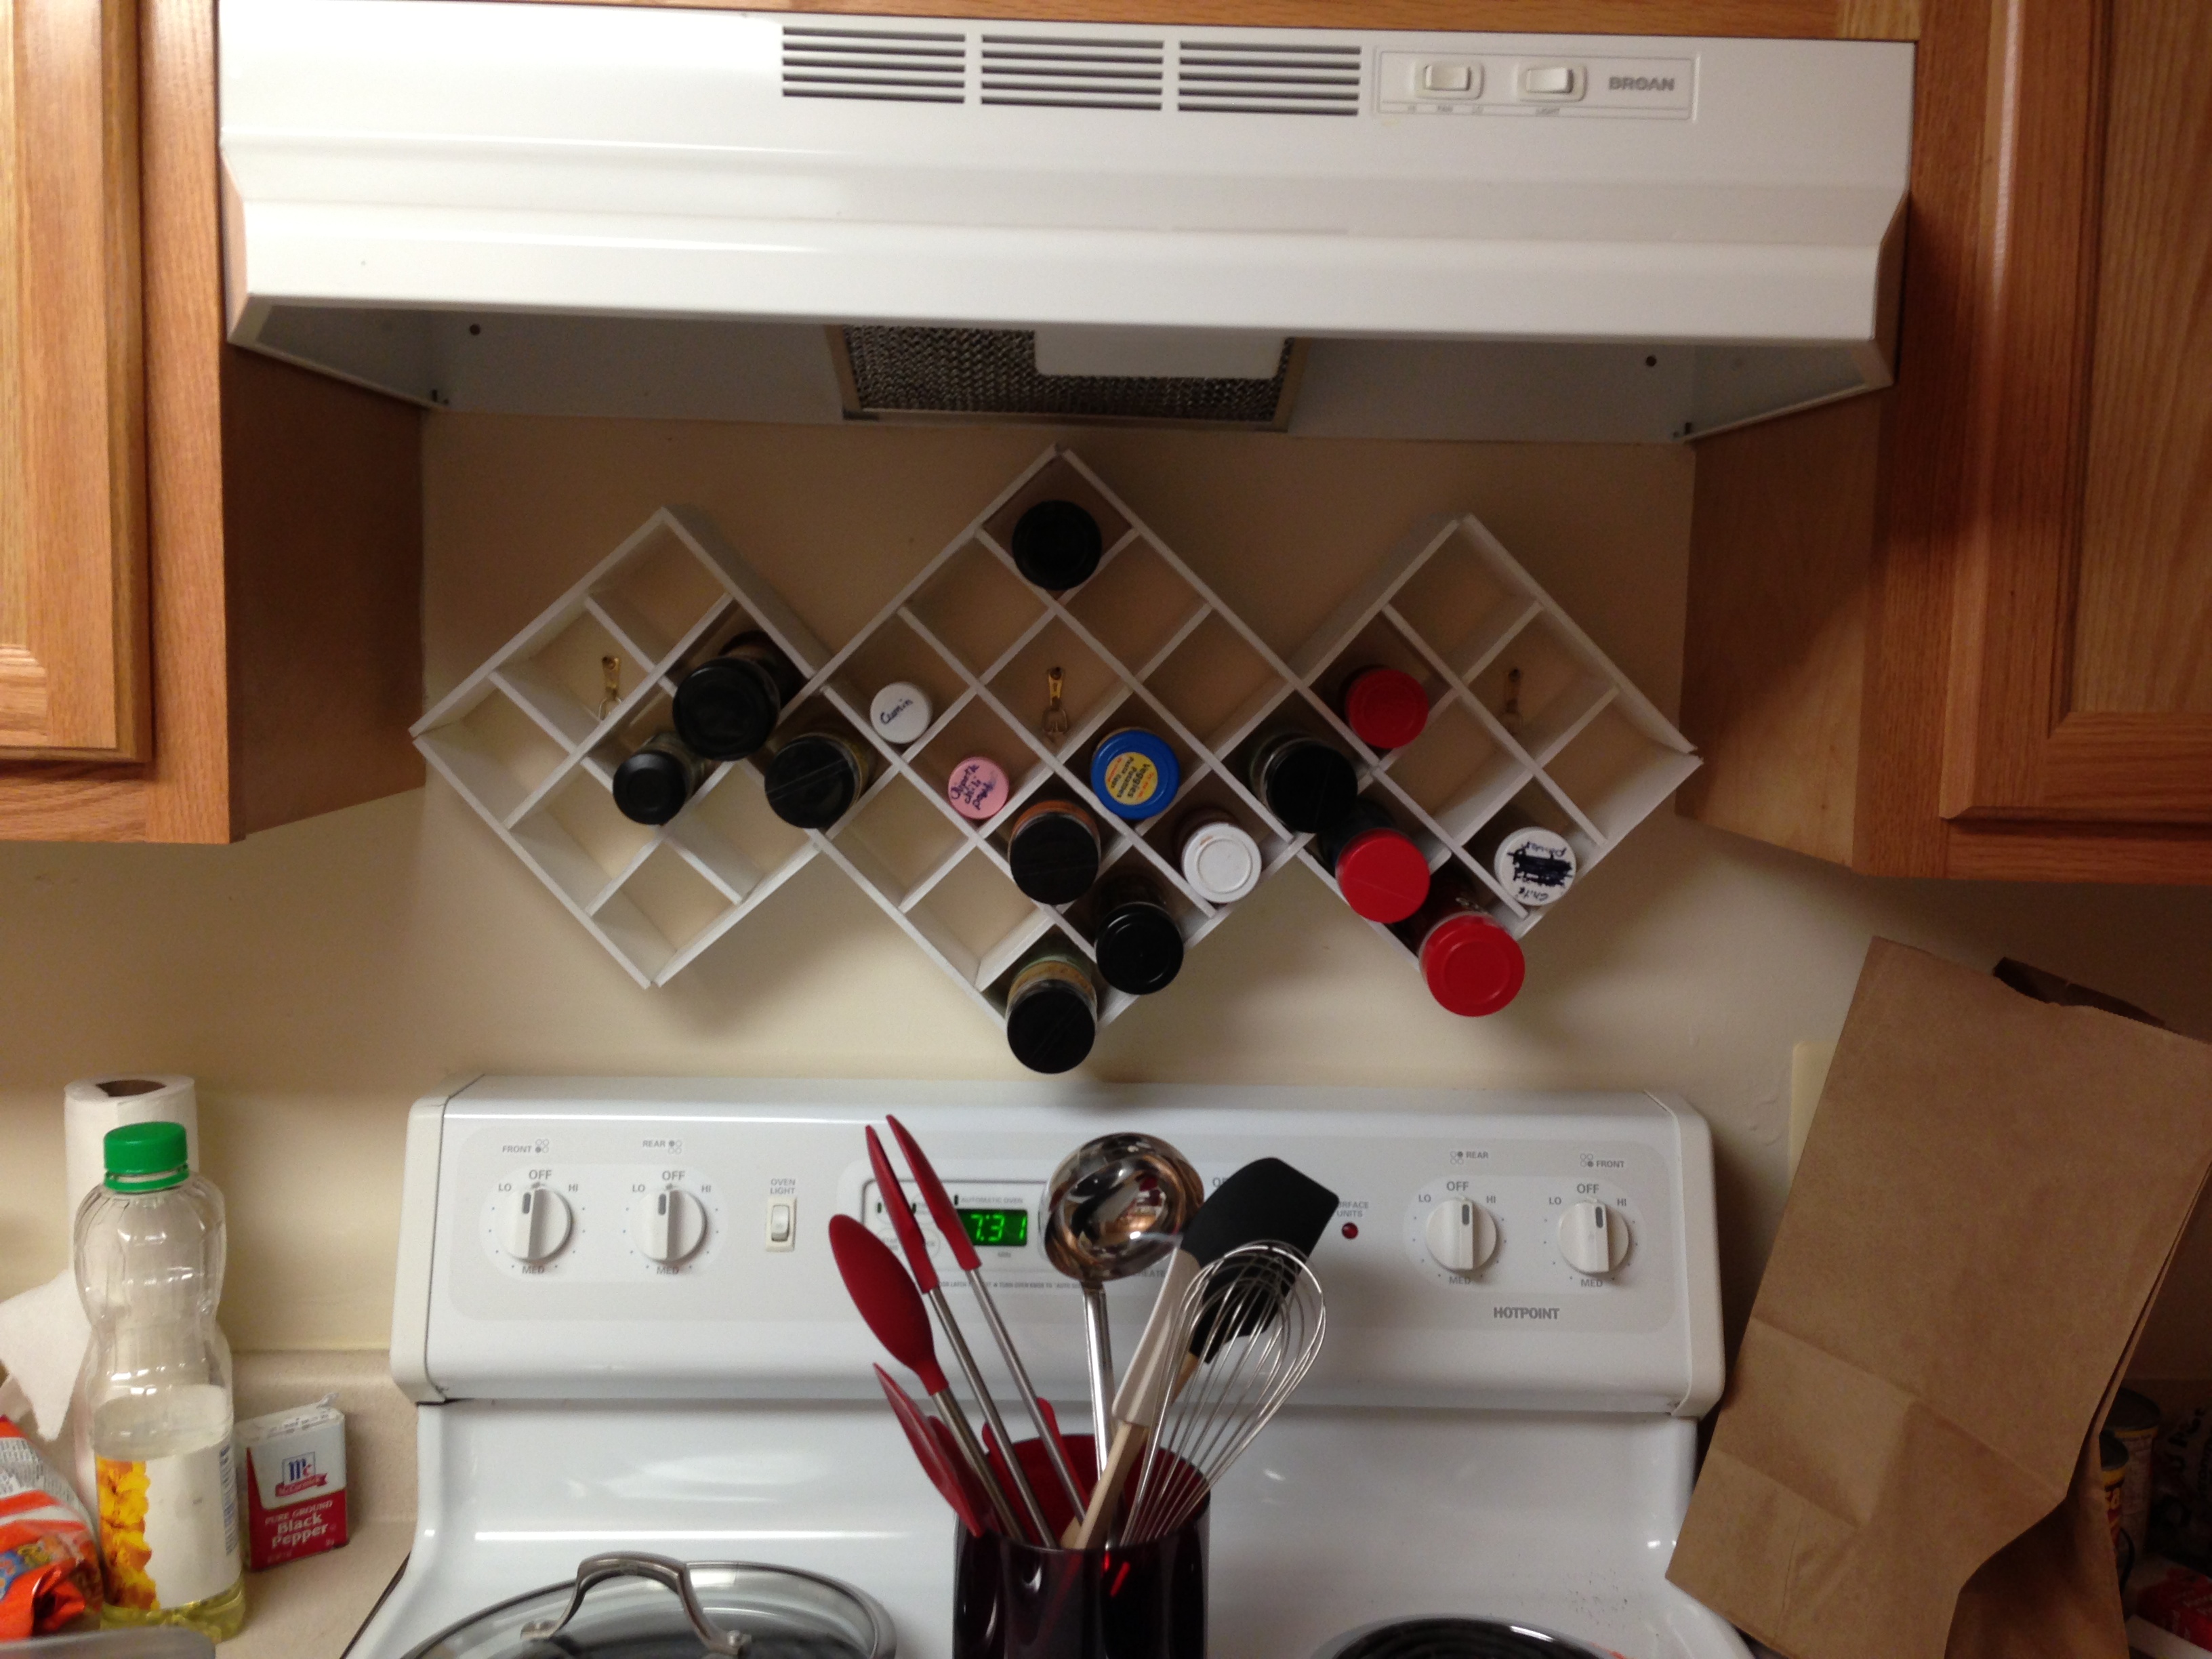
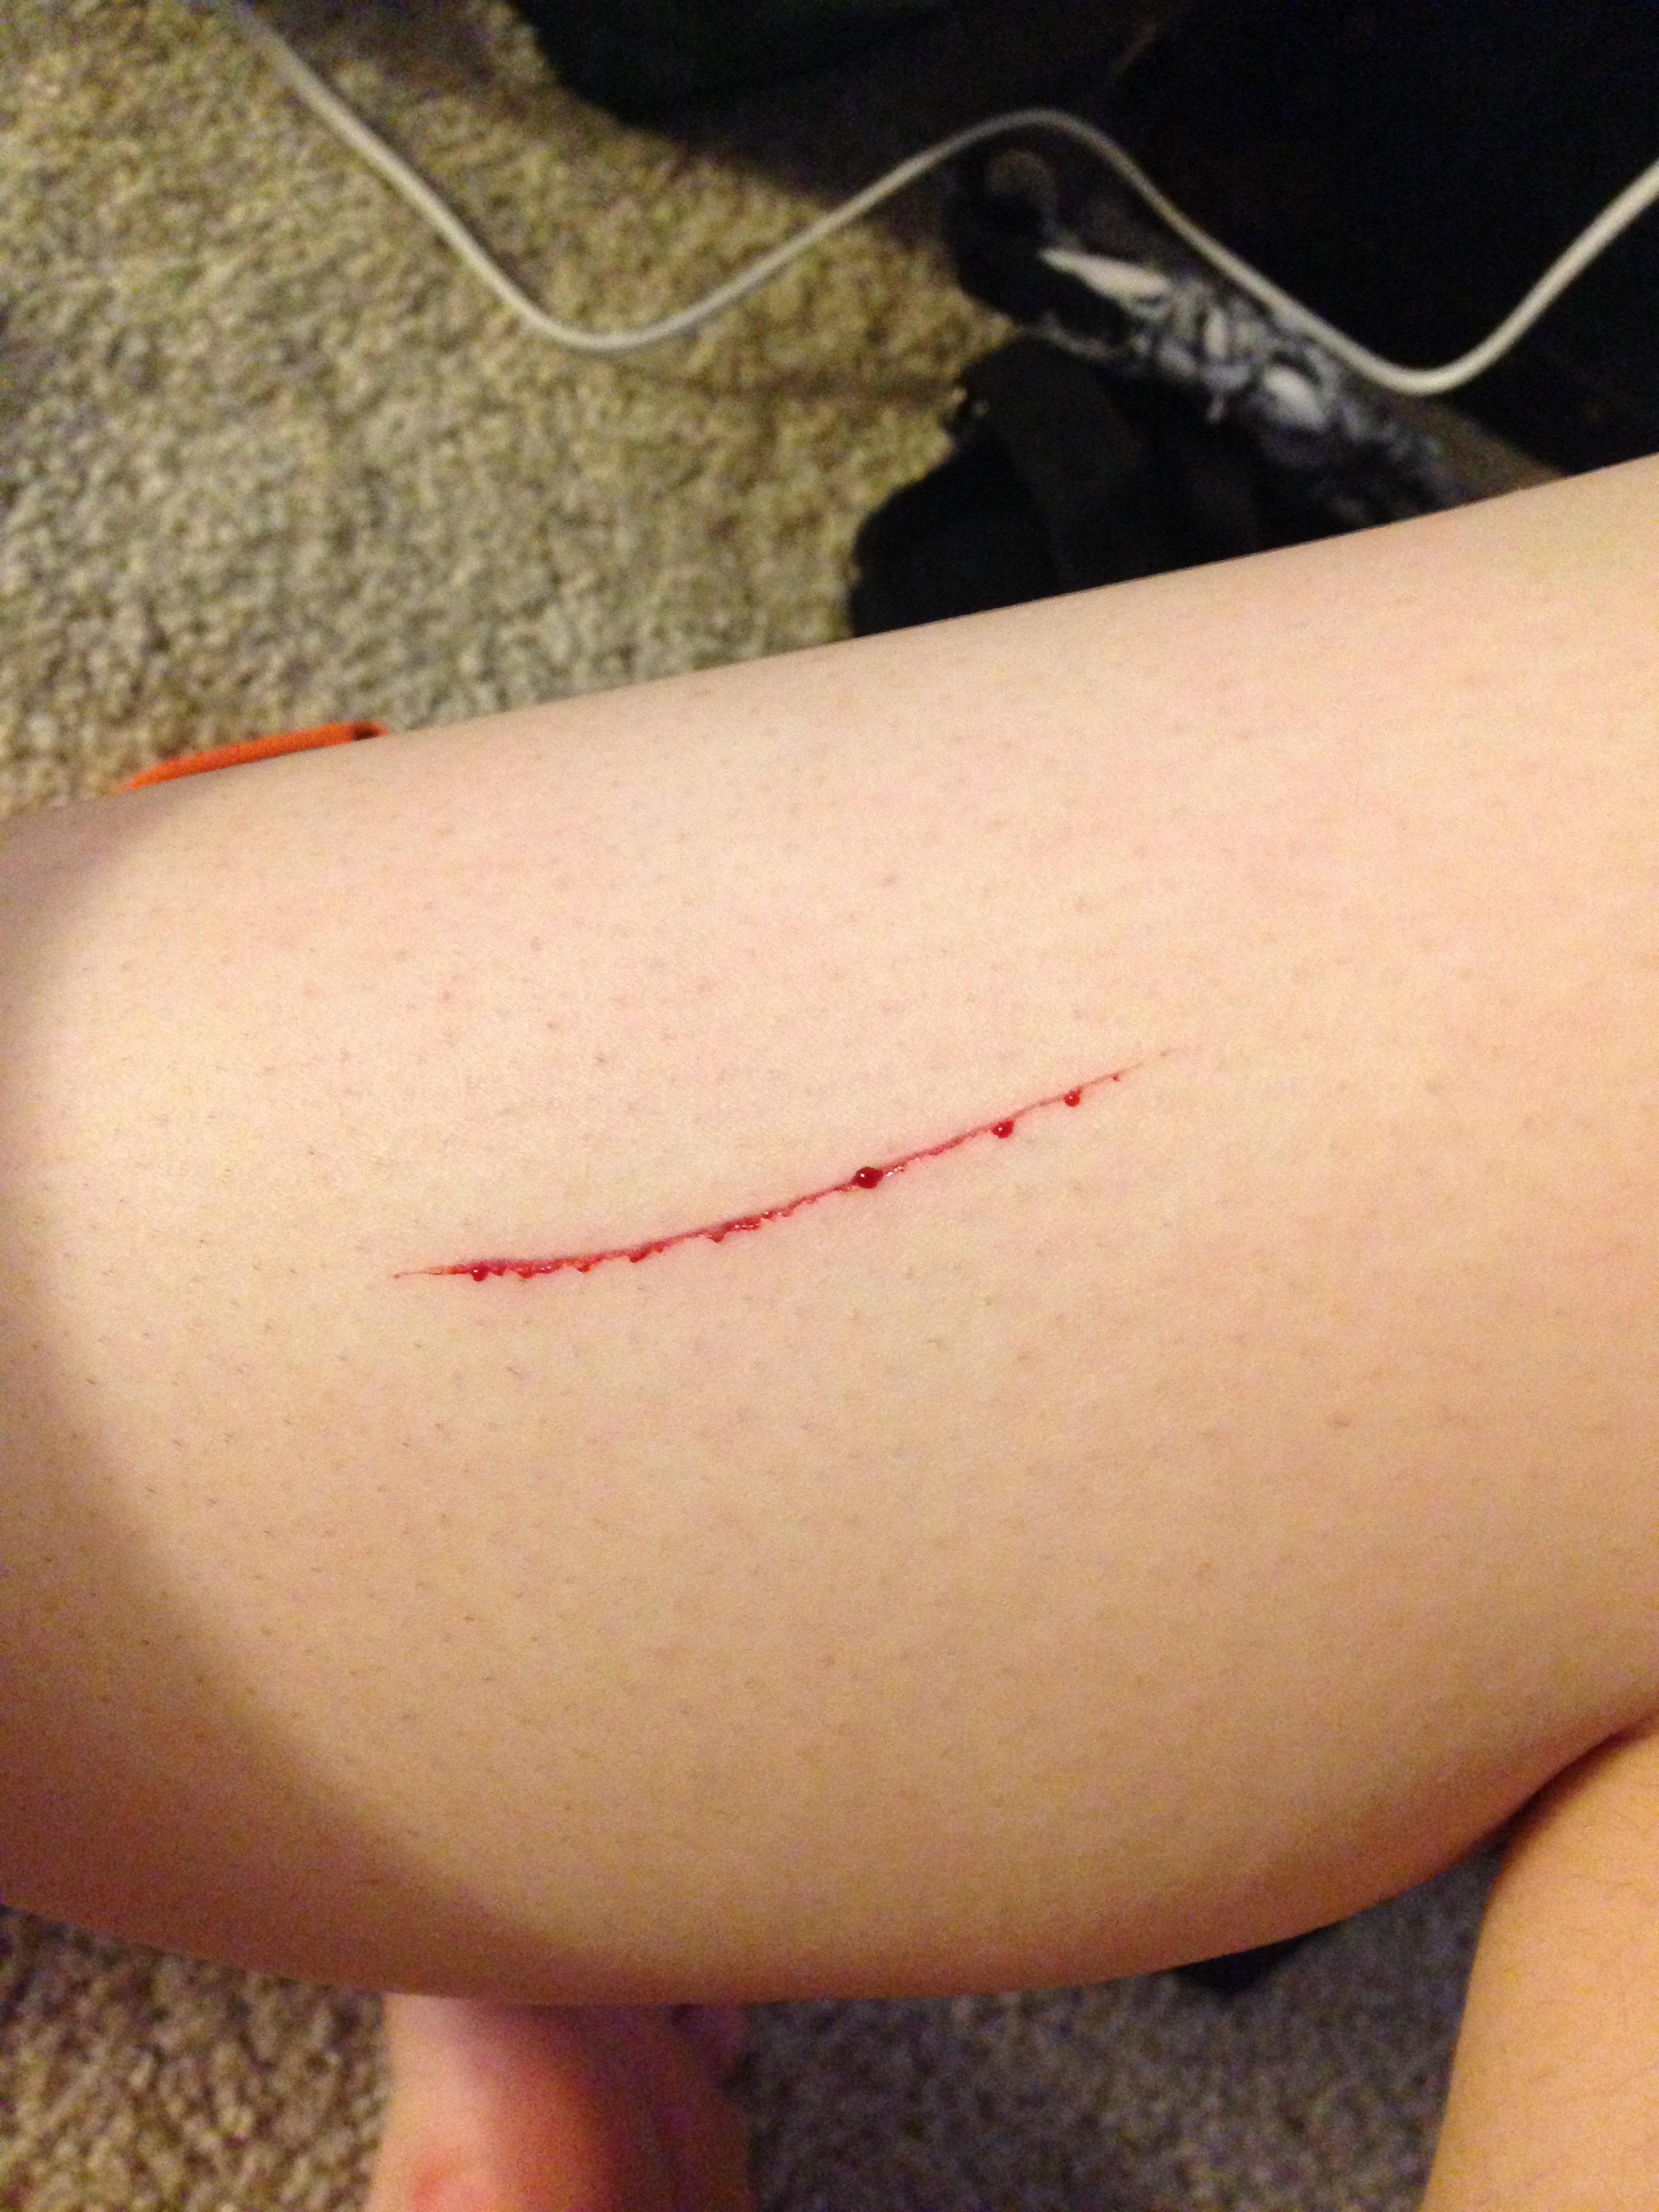
I needed a spice rack. I had foam board. Ta-da! Although I did accidentally stab myself with my utility knife, but that’s cool. As usual I was using sharp things in a stupid way, so that’s on me. Although 5 months later you can still see the scar. Maybe I should consider being more careful? Nah.
So that’s the story of my nail shelves, and how they were made. I wonder if I could make a profit building and selling them. Probably would depend on how much shipping costs. Maybe I could make easy to assemble kits. Maybe I could make enough profit to buy my own power drill!